Happy Fall Z Fold Card Tutorial

Hey crafty friends! I’m so excited to share my newest project — a Happy Fall Z Fold Card made with an SVG I designed! This fall card is perfect for celebrating the season with warm colors, shiny metallic cardstock, and that fun interactive Z fold we all love.
Supplies Used
All of the cardstock for this project comes from CutCardStock.com.
Here’s the full list of what I used:
Cougar White 80 lb – for the card base
Discount Card Stock Textured 80 lb in Vanilla Bean Brown
Stardream Metallic 105 lb in Copper
Stardream Metallic 105 lb in Antique Gold
Lesebbo Cardstock 83 lb in Coffee Bean
Pop-Tone Cardstock 65 lb in Jellybean Green
Pop-Tone Cardstock 65 lb in Black Licorice
Nuvo Liquid glue (back in stock & on sale!) w/precision glue press
Foam squares (on a great sale now!) and foam tape
an electronic cutting machine - I used my Cricut Maker for this card
You’ll also need my Happy Fall Z Fold Card SVG file to create this card with your electronic cutting machine.
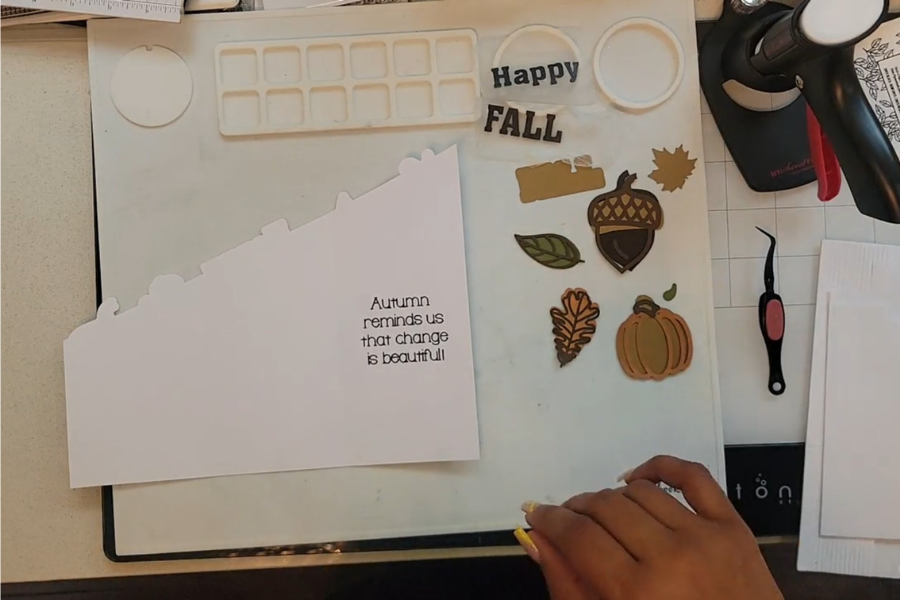
Cutting the Pieces
Start by cutting the card base from Cougar White 80 lb cardstock and fold along the score lines to create the signature Z shape.
Then cut all the decorative elements from the colors below:
Leaves: Stardream Metallic Copper, Pop-Tone Jellybean Green, Lesebbo Coffee Bean
Acorn: Textured Vanilla Bean Brown, Coffee Bean, Stardream Metallic Antique Gold
Pumpkin: Jellybean Green, Coffee Bean, Antique Gold, and Copper
Words: “Happy” in Black Licorice and “Fall” with an Antique Gold outline
Single leaf near “Happy” — Antique Gold
Assembling the Card
Now for the fun part — putting everything together!
Leaves: Glue the brown outline on top of the green leaf, and repeat for the bronze leaf.
Pumpkin: Glue the copper outline layer on top of the antique gold layer.
Acorn: Glue the antique gold top to the Vanilla Bean Brown base, then add the Coffee Bean outline.
Word “Fall”: Glue each letter (F-A-L-L) to the antique gold outline.


Putting It All Together
Middle panel: Glue down the word “Happy” and the antique gold maple leaf.
Front panel: Add foam tape to the back of the acorn and bronze leaf and attach them.
Front sentiment: Add foam tape to the back of “Fall” and place it on the front panel.
💡 Pro tip: Use a T-ruler to line up your letters for a straight finish!
Back panel: Add foam tape to the pumpkin and green leaf, then glue them down.
Don’t forget to glue the small pumpkin leaf directly to the card base.
Finish by stamping your personalized “handmade by” stamp on the back to make it truly your own!


Final Thoughts
I absolutely loved designing and making this Happy Fall Z Fold Card! The mix of metallic cardstock gives it such a warm, elegant shine — perfect for the season.
I hope you give this fall card tutorial a try and share your own version with me. Thanks so much for crafting along with me!
💛 – Tiffani
