DIY Valentine Cracker Box Tutorial
Hello crafty friends! Today on the blog I’m sharing how I made this fun Happy Valentine Cracker Box using cardstock and an SVG file I designed. This DIY Valentine’s Day 3D box is perfect for holding larger treats, small gifts, or even for using as decorative table décor for Valentine’s Day parties.
If you love making handmade gift packaging, paper boxes, or 3D SVG projects, this Valentine cracker box is a fun and beginner-friendly project to try.

What Is a Valentine Cracker Box?
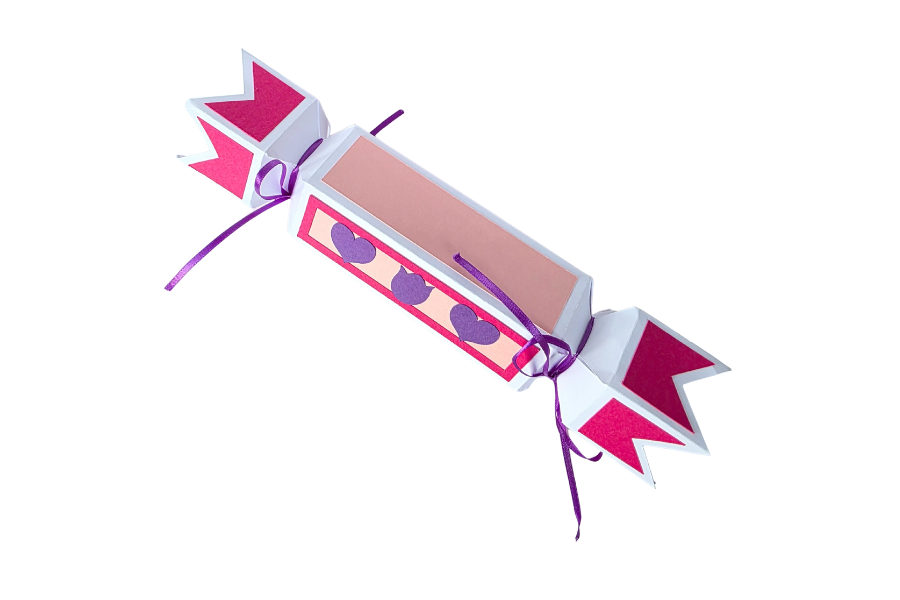
A cracker box is a 3D paper box inspired by traditional holiday crackers, but made entirely from cardstock. This Valentine cracker box SVG creates a sturdy, decorative box that can be tied closed with ribbon and filled with candy, gifts, or party favors.
This design works great for:
Valentine’s Day treat boxes
Classroom Valentine gifts
Party table decorations
Handmade Valentine gift packaging
Supplies Needed for a DIY Valentine Cracker Box
To create this Happy Valentine Cracker Box, you will need:
Happy Valentine Cracker Box SVG file
Electronic cutting machine
(Silhouette Cameo, Cricut, or Siser)Cardstock from CutCardStock.com:
Cougar White 80 lb (box base)
PopTone Bubblegum 65 lb
Discount Cardstock Amaranth Pink 80 lb
PopTone Grape Jelly 65 lb
Black permanent adhesive vinyl for the sentiment
(Black cardstock can be used instead)Ribbon or string (purple or coordinating color)
Liquid glue
Bone folder (recommended for shaping the box)
The Cracker Box SVG Pieces
I cut all of my pieces using my Silhouette Cameo 5 with the electrostatic mat.
Here’s how I broke down the cardstock colors:
The two main box base pieces were cut from 12×12 sheets of Cougar White cardstock to ensure strength and structure.
The flag ends and frame layers were cut from Amaranth Pink cardstock.
The rectangular background panels were cut from Bubblegum cardstock.
The decorative hearts and tulip were cut from Grape Jelly cardstock.
The sentiment was cut using black permanent adhesive vinyl, which helped keep all the letters aligned and easy to apply.
Assembling the Cracker Box
Step 1: Shape the Box Base
Using a bone folder, gently fold along the score lines of the white box base pieces. This helps form the cracker shape and makes it easier to identify the front and back of the box before decorating.
Step 2: Layer the Decorative Panels
Glue the Amaranth Pink frame pieces on top of the Bubblegum pink rectangles using liquid glue. Once those are assembled, glue the Grape Jelly hearts and tulip onto the framed panels.
Step 3: Add the Valentine Sentiment
Apply the black vinyl sentiment to the blank rectangular pieces. This method makes sentiment placement quick and clean, but black cardstock works just as well if you prefer layered paper instead of vinyl.
Step 4: Attach Panels to the Box
Glue the finished rectangular panels onto the box base.
Optional: Use foam tape instead of liquid glue if you want extra dimension on your Valentine box.
Next, glue the decorative flag ends in place.
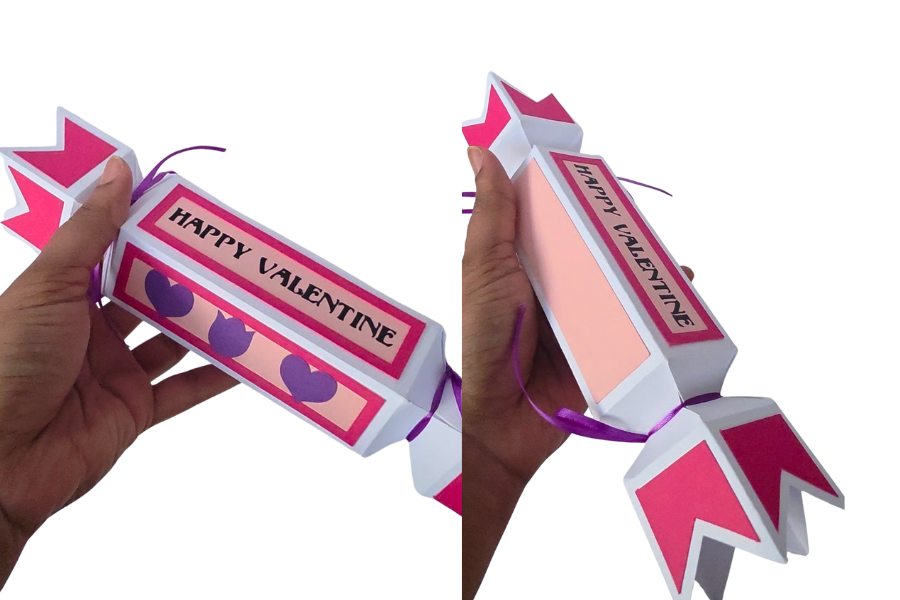
Pro Tip: You can keep one side of the box simple by using only the rectangle panel without the flags, as shown in the photos.
Final Assembly
Once all panels are attached, fold the box into its cracker box shape. Glue the two ends together to hold the structure securely.
To finish the box, tie a ribbon or string around both ends. This not only completes the cracker look but also helps keep treats safely inside.
Finished Valentine Treat Box
And there you have it — a DIY Happy Valentine Cracker Box that’s perfect for treats, gifts, or Valentine’s Day décor. This 3D paper box is sturdy, customizable, and a fun way to elevate your handmade Valentine projects.
If you give this Valentine cracker box a try, I’d love to see it! Be sure to tag me @akraftingalley so I can check out your beautiful creation. FYI - you can find the SVG file in the Etsy Shop or the Silhouette Design Store.
Thanks so much for reading,
Tiffani 💕